Running TIM Enterprise over SSL/HTTPS
To configure TIM Enterprise to run over HTTPS (HTTP over SSL), you'll need a valid SSL certificate issued by a trusted certificate authority (CA). The certificate should be in PKCS#12 format (usually with a ".pfx" extension) and include the private key. To apply the certificate to TIM Enterprise, follow the steps below.
Prerequisites
This guide presumes you have already installed your (valid) SSL certificate into the MY certificate store using the Local Machine account, since TIM Enterprise runs as a system service in that context. You will need your certificate file as well as the password for it.
Installing the certificate to the MMC certificate store
Install the certificate by double-clicking on the certificate. This will open the certificate import wizard.
Now we need to select where you would like the certificate stored. Since TIM Enterprise is a system application, it will need to be installed to the "Local Machine".
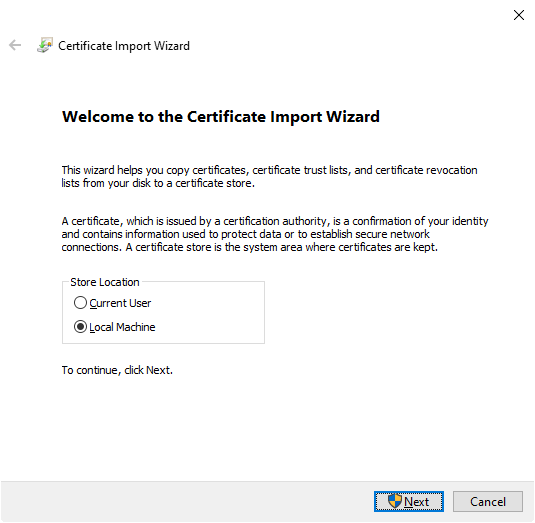
Click Next to continue; Windows UAC may pop up, in which case, press "Yes" to continue.
The wizard will now ask you which file you would like to import. As we’ve double-clicked on the file, this should contain the location of the
.pfxwe initially double-clicked on. Note: If this isn’t correct, please click "Next" and browse to the certificate you want to import.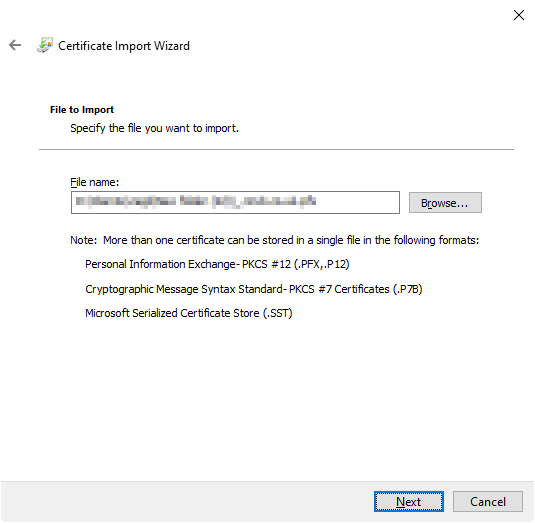
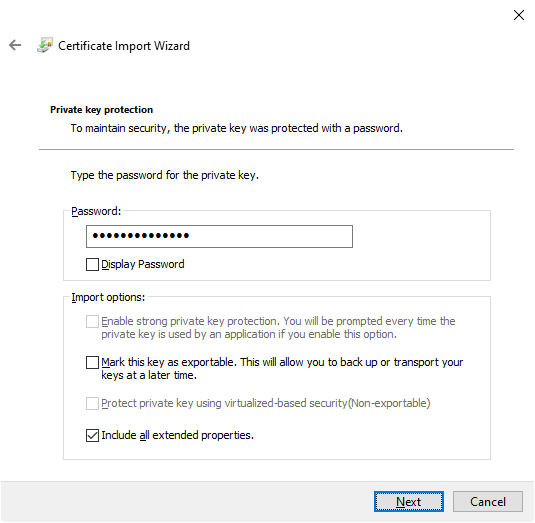
The wizard will now prompt you to enter the password for the Private Key contained within the certificate. Enter your password and click "Next". If the password is valid, it will allow you to continue with the import of the certificate.
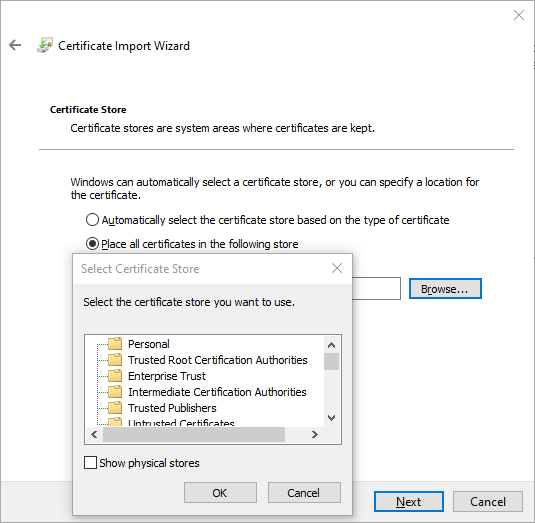
The wizard will now prompt you to select where you'd like to install the certificate. The certificate needs to be installed to the "Personal" store. Select this and press "Next" to continue.
The final stage of the wizard is a summary of the import. Click "Finish" and the certificate will be imported into the Local Certificate store. The wizard will inform you of a successful import.
Checking the Local Certificate store for the imported certificate
Press the
Windows key + Rto launch the Run dialog. Entermmc.exeand click "OK". Choose "Yes" if the UAC box requests authorisation.
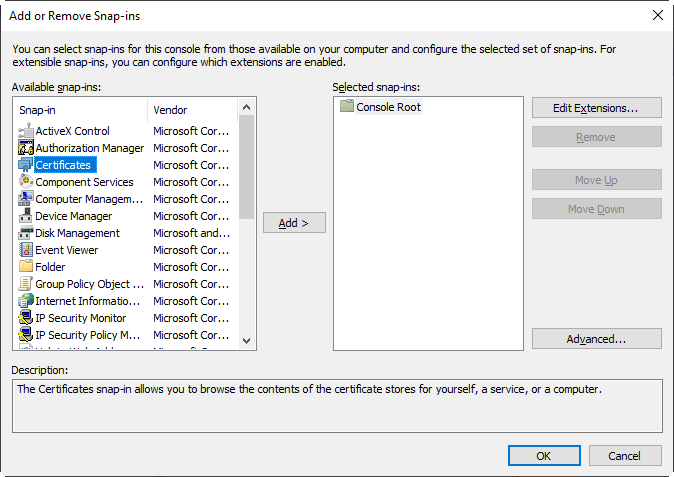
The Management Console will appear. From here, add a new snap-in by clicking on "File", then choosing "Add or Remove Snap-in", then "Certificates", then "Add".
You'll then be asked to select which snap-in you'd like the manage. Select "Certificates", then press "Add".
When asked which account you want to manage, choose "Computer account", then press "Next".

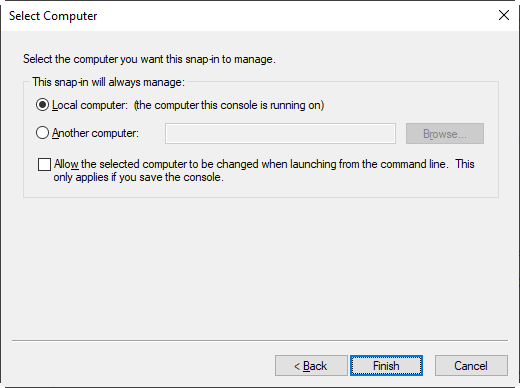
Select "Local Computer (the computer this console is running on)" and click "Finish".
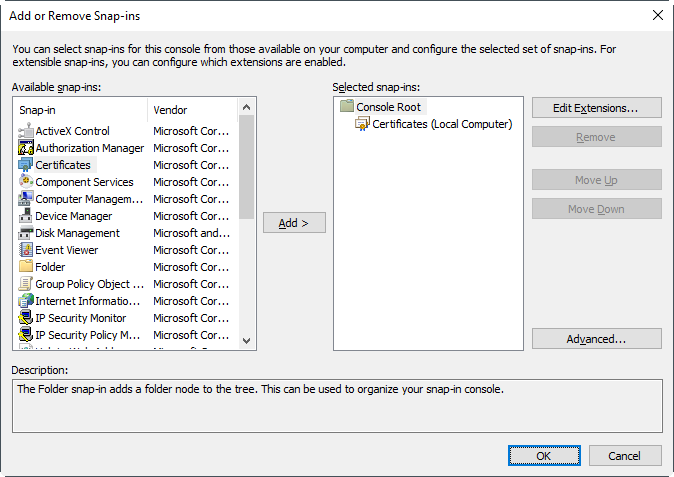
In the "Add or Remove Snap-ins" window, within the "Snap-ins" panel, select "Console Root > Certificates (Local Computer)", and click "OK".
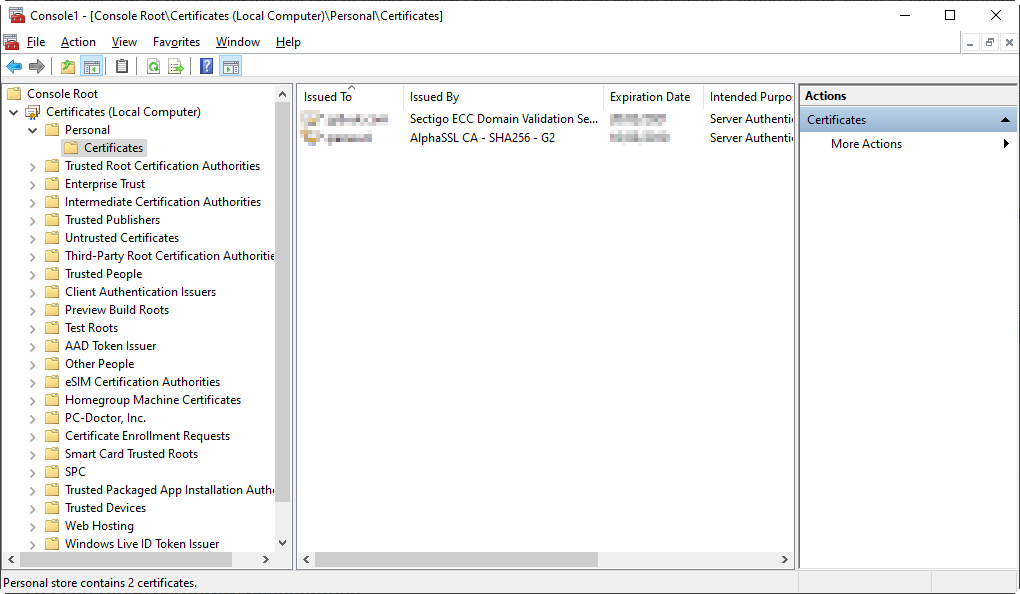
Within the Console window, expand the "Console Root" folder, expand "Certificates (Local Computer)". Expand "Personal", then "Certificates". In the right-hand pane, you should now see the certificate you imported.
Configuring your certificate in TIM Enterprise
Log in to TIM Enterprise using the root account from a web browser running on the same machine as TIM Enterprise. If you do not know your root password, please contact your vendor's Technical Support team. After successfully logging in as root, you'll see a panel entitled "Web server", where we will configure your web server settings.
Ensure the correct web server port is selected; HTTPS typically uses port 443.
Select the security protocol to be used. For maximum compatibility, select "HTTPS (Automatic)" here. If your organisation has specific requirements, you may select other security protocols, such as SSL2, SSL3, TLS1.2, etc.
In the "Server certificate" drop-down box, select your newly-installed certificate.
Click "Test settings" in the top right of the "Web server" panel to check if your certificate was installed successfully. If it was, the button briefly turns green.
Save your new settings by clicking on the "Save settings" button in the top right hand corner of the page.